Step-by-Step Assembly Guide
This assembly guide assumes that you’ve built amps before and that you just need guidance on the decisions you will have to make while assembling this particular amplifier. See the FAQ for my stance on what experience level you need to build this amplifier.
You’ll want to have a copy of the schematic handy while building the amp.
There are two major ways to build a PIMETA v2, thru-hole and surface-mount. Every amp will have a mix of both, because several of the parts are thru-hole only, and the buffers can only be surface-mounted. This guide will assume that where you have a choice, you will use the thru-hole components, as this makes more demands on the order you install things. The first rule for deciding which order to solder the parts down in is shortest-to-tallest. The surface-mount parts are all very similar in height, so the second rule of board stuffing is more applicable: inside-to-outside. There’s nothing wrong with installing the surface-mount parts in the same order as you would if you were doing thru-hole, it’s just that you have more freedom to switch the order around for your own convenience.
1. Add the jumpers
Going with the shortest-to-tallest rule, the first parts to add are the jumpers.
For all of these options, you can just use resistor lead clippings for the jumpers. Some people use short bits of hookup wire or specially-made 0 Ω “resistors” instead. (The latter look just like resistors, but just have solid wire through the resistor body.)
On the PIMETA v2, none of these jumpers are required. I’ve broken them out into a separate section just to be sure you consider them all and don’t forget the ones you do want.
The input capacitor positions, C1, must be jumpered if you want to leave the caps out. This is a change from PIMETA v1, where these positions were jumpered on the board itself, and you had to cut the traces to add the caps. On v2, if you don’t want the caps, you have to jumper these positions. If you’re not sure whether you want these caps or not, please read the companion article Input Capacitors for Headphone Amps.
Another change in PIMETA v2 is that there are now two LEDs on the board, both of which are suitable for use as power indicators. The part selection guide covers the choices in the LED1 and LED2 sections. Depending on the configuration choices you make, you might need to jumper one (or both) of these. See the guide for details, though. There are several ways you can go here, and only some ways require jumpers.
The power supply diodes, D1 and D2 are also jumperable, depending on your amp’s particular power configuration.
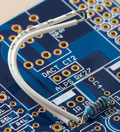
Finally, there’s the switchable class A biasing. There are several configuration options here, but only one concerns us here. That being, you might want the bias to be switchable when the amp is completed, but want it always-on as you’re building the amp so it’s tested along with everything else. You can then put off adding a switch here until you do the casework near the end of the build. Between one end of RBLIM and the OL pads, you will find two unlabeled wire pads. When these are not connected, the bias is disabled, and when jumpered, it’s enabled. The easiest way to do this is to figure out how much hookup wire you will need to reach the SPST bias toggle switch on your amp’s panel, add two wires of that length to the board in these wire pads, and then just solder the other ends together. When you’re ready to set up bias switching, reheat that joint and solder the freed ends to your switch’s solder lugs.
2. Add the resistors
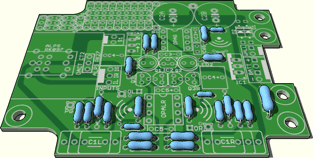
Next up, following the shortest-to-tallest rule, are the resistors.
Some of these are optional, some you might want to leave out until a later stage, and in some cases you might want to use a thru-hole part where you use SMT resistors elsewhere or vice versa. To avoid the hassle of desoldering resistors later, you should at least skim through this guide before you start soldering.
In particular, you might leave out RBLIM for now if you want the class A biasing to be disabled until you’re ready to play with it. There are five possible configurations:
always-on, from the start: install RBLIM so that it spans the switchable bias jumper pads, as at right; if you will be using fixed bias, span the RBIAS position as shown in that section of the parts selection guide, too
always-on to start, switchable later: install RBLIM just like the other resistors, with the jumper wires installed but with the ends soldered together as above
disabled to start, always-on later: just like the first option, but you leave RBLIM and the jumper pads unpopulated for now; install RBLIM as in the first step when you’re ready
disabled to start, switchable later: obvious from the above
no bias: just leave RBLIM out

3. Add the diodes
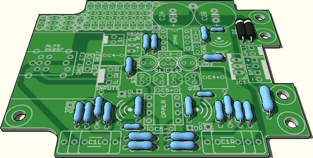
Your amp will almost certainly need at least one of these diodes.
There are valid configurations where you jumper one or both, but you lose features. See the D1/D2 explanation in the part selection guide if you aren’t sure which diodes you need. Or, given that diodes are just a few cents each, you could just add them both and not worry about it. There’s no harm in having a diode that isn’t actually used now, which might be used later when you add features to your amp.
Be careful to orient the diodes properly: the stripe goes toward the bar on the silkscreen, or toward the top of the board if you have it oriented as at right. The stripe on surface-mount packaged diodes can be a bit hard to see sometimes, but it’s there, and it goes the same direction.
4. Add the small capacitors
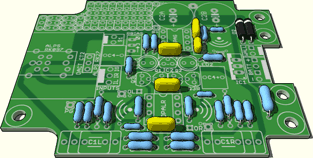
The next larger parts are the bypass and compensation caps.
Not shown at right are the compensation caps you might want to put across R6, which would have to be surface-mount if the R6es are thru-hole, and so are on the bottom side of the board. These caps might not be needed, but you can’t tell unless you have an oscilloscope and a square wave generator to test for ringing, or are building the same configuration as someone who has done that test. If you’re not certain you don’t need them, add them.
5. Add the TO-92 parts
This is IC2 and the transistors. All of these are optional on the PIMETA.
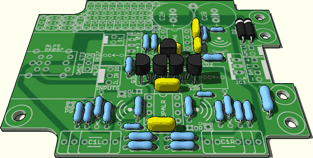
The PIMETA board is designed with single-voltage supplies in mind, and in this case, you need the TLE2426. However, you can instead use a true dual-voltage power supply, allowing you to leave out the TLE2426. In that case, V+ and V- from the power supply go to the outer + and - pad pair, and GND from the power supply goes to the OUT pin of the TLE2426 position. (The pads marked IG and PG on the board are connected to this OUT pin on an inner board layer, but this OUT pin is nicely centered in the board, so it works best as the primary power supply ground connection.)
If you aren’t sure whether you want to bias the op-amp into class A, you can leave all the transistors out. Adding them later won’t be very hard. Alternately, you can install the transistors now, but disable the bias temporarily as described above.
6. Add the LED(s)
This step is for those who want to board-mount one or both of the LEDs. If you’re going to panel-mount an LED as a power indicator, you’ll want to put this step off until you’re ready to test the power supply at least. You can put it off until right before you do the casework. You don’t really want an LED waving around on the end of a pair of hookup wires while doing the intervening steps. Refer back to the advice when you’re ready to add the panel-mounted LED.
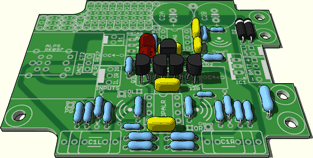
I board-mount LEDs to illuminate the interior of a case I can see into, either because it’s transparent, or because there are venting slots. When doing this, don’t solder the LED right down at board level, because the other nearby components will block its light. Instead, let it stand up off the board on its legs. With a small case like the H-65, I set it up so the LED will be just short of the top case lid. With a more spacious case, you might put it so it’s more centered within the case height. Sometimes, I’ll put some kind of reflector over the top of the LED lens so more light gets bounced back down onto the board. Hobby stores sell little dome-shaped crimp-on studs for clothing that work well for this. You can find them near the sequins, which would also work.
LEDs are polarized, and will die quickly in a PIMETA if installed backwards. The positive pads are the ones toward IC2, and are marked with little plus signs on the silkscreen. The positive leg on the LED is usually the long one, but this convention isn’t universal; check the datasheet!
If you’re using class A biasing and don’t want an LED in LED2 you should have jumpered it already. If not, do it now because it’ll be harder to do later when you have a bunch of nearby large parts on the board.
If you’re using LED2 for a panel-mounted power indicator and are also using the class A biasing feature, add the LED1 and RLED parts now. This is some combination of jumpers and diodes, depicted and described elsewhere. Regardless of how exactly you set this up, these parts need to go in now.
If all this is confusing to you, you need to go back and re-read the LED part selection discussion and the class A biasing tweak section before you start soldering. These parts are right in the middle of the board and are fairly small, so you don’t want to get it wrong or put it off until later if you can avoid it.
7. Add the sockets, connectors, and trim pot
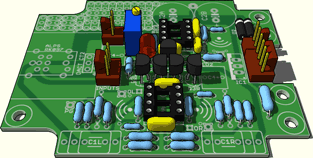
Now that all of the small components are placed, you can start placing the large ones.
Add the op-amp sockets first, if you want them. Be sure to align the notch in one end with the outline on the board’s silkscreen.
Next, add the various connectors: S1, INPUTS, WALL and/or BATT. If you don’t want to hard-wire the output jack to the board, you can add do the output connector tweak now, too.
If know you want the class A biasing feature, add the RBIAS trim pot now. The biasing will still be diabled if you set it up that way with the jumpers above.
8. Add the NiMH trickle charger’s LM317
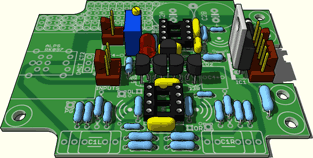
If you want the NiMH trickle charger, add its LM317 now. The picture shows the TO-220 version, but if your charge current is under 100 mA, you can use an LM317L instead, which comes in the TO-92 package. You just have to splay its legs out to fit in the wider hole spacing needed by the TO-220 version.
9. Add the big capacitors
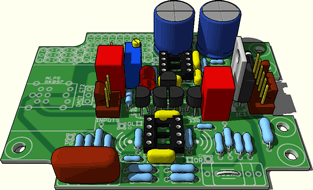
There are three pairs of large caps on the PIMETA v2 board.
First add the C4s:
If you’re using film caps, their orientation doesn’t matter.
-
C4 can also take tantalum caps, and they are polarized, so orientation matters. Typically with tantalums, the positive lead is marked with a stripe, unlike with electrolytics, where the negative lead is the one with a stripe. Don’t get this backwards, or you’ll destroy your caps. Tantalums don’t always blow up when connected backwards across a power supply, so you can’t count receiving on a smack with the clue-bat if you orient the C4 caps backwards.
The top-side footprints don’t have polarity markings since they are intended for use with film box caps, which are not polarized. So if you’re mounting leaded tantalums on the top side, just remember that the negative pad of both caps is toward the rear of the board, where the power input pads are.
The bottom side footprints are intended for use with SMT tantalums, so they are polarity-marked, with little + signs near each cap’s positive SMT pad.
Next add the input caps, or jumpers if you don’t want an AC-coupled amp. (The picture at top right shows one of each.)
Finally, add the big rail caps. There are two “official” C2 positions on the board, sized for 10 or 12.5 mm diameter electrolytic caps, but you can use the scratchpad area to hold a third rail cap. Or, you can use the B+ pad between the two C2 positions for a single big 16 or 18 mm diameter cap. Like the tantalum caps you might be using for C4, all the caps you’d use in C2 are polarized, but the markings are different. One leg of each cap should be longer than the other; that’s the positive one, and it goes toward the pad marked with a plus sign. There should also be a stripe on the cap’s plastic covering on the negative side.
10. Add the volume control
Now add the final large component: the volume control.
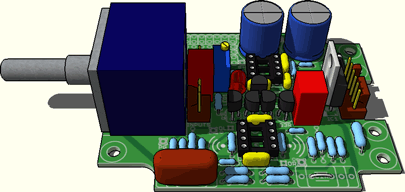
If you get low humming when you touch the pot’s shaft, try adding a ground wire from the pot’s case to the PG pad on the board. With the ALPS RK27 pot, this is easiest to do by loosening the upper screw holding the back of the pot shell on, wrapping the other end of the wire around the exposed bit of the screw shaft, then tightening it back down to trap the wire. With other pot types, it’s probably easiest to trap the other end of the wire between the pot’s mounting surface and the front panel.
If you get some other kind of noise, especially if it happens when you’re not touching the amp, look elsewhere before grounding your pot. If the pot’s shaft is plastic, the pot’s case probably doesn’t need to be grounded. (The Panasonic EVJ pot is an example of this.)
If you have a pot that doesn’t fit one of the footprints provided on the board, you can run wires from it to the ALPS RK27 pads. Looking at the front of the board — down the pot shaft — the pads to the left are the ground side, the ones in the middle are the wipers, and the ones to the right are the input side. The front gang goes to the left channel on the board.
11. Test the power supply

Run wires from your power supply to the board. If you added a Molex connector for WALL or BATT, you might want to build an adapter for your power source first — like one of those pictured at right — which lets you plug it into the board directly.
If you’re using just a single battery, the “right” way to hook it up is to use the outer pair of pads on the BATT connector. However, if you’re certain you won’t use a wall supply, you can actually use the WALL connector, saving that bigger 4-pin connector for a project that actually needs it. In either case, the square pad on the board is for the positive connection.
The main reason for the BATT connector is if you’re using two batteries in series or are using the NiMH charging feature. The connector has four pads. The outer pair are for the positive and negative connections to the battery, the positive one being square. The center pair are connected together, which allows you to hook two batteries up in series. This is far more convenient than hooking two battery connectors up in series off-board. The positive lead from one battery holder goes to the square BATT pad, the negative lead goes to the pad next to it, the positve lead from the other battery holder goes to the other center pad, and finally the negative lead from the second battery holder goes to the BATT pad farthest from the square one.
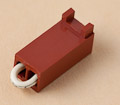
During testing, I don’t typically use the board’s power switch. I find it more convenient to control power to the board with the power source itself. If you use a bench supply, you have its switch. You don’t really need a switched power source, as you can just unplug it from the board when you want the power to be off. If you’re using the S1 connector, you can make a shorting plug for it from a spare 2-pin female Molex KK shell — shown at right — to ensure that the board gets power whenever the power source is on and plugged in. I keep that plugged in the whole time while testing so there’s no confusion from having two switches. If you’re using the ALPS RK097 pot with the built-in switch, you can still use the Molex shorting plug, or you can just turn the knob up a bit so the switch closes.
If you’re going to panel-mount one of the LEDs for a power indicator, you probably didn’t add it above. This is a good time to add it, as you’re nearly finished, and having a power indicator while you test the power supply can be helpful. Be sure to follow the LED polarity guidelines above!
Now that all the parts are in place, power up the board. The LED(s) should light up; if not, find out why. Then check the voltages at all of the DIP-8 chips’ supply pins relative to input ground (IG). If you don’t get approximately half the power supply voltage at each power pin (with the correct polarity) find out why before proceding.
When you’re satisfied that the chips are receiving the proper voltages, remove power from the board.
12. Install the op-amps and buffers
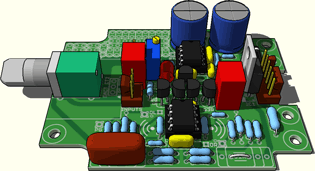
Now that the amp is almost complete, it’s time to add the parts that will turn it into an amplifier: the op-amp and buffer chips.
We deliberately put this step off until we tested the power supply to avoid blowing up expensive chips. There are more things that can kill chips than bad supply voltages, but it’s an easy thing to check.
Be careful not to install these chips backwards. Depending on the chip, it can be that the amp just doesn’t function right until you fix the orientation. In other cases, the chip can be damaged. With OPALR in particular, the chip will probably die instantly if you apply power with it in the board backwards, because the V+ and V- pins are at opposite corners, causing reversed power to be applied to the chip. The chips themselves have markings to indicate pin 1: there may be a notch, bevel, or divot on the edge containing pin 1, or right near the pin itself. Pin 1 is also marked on the PIMETA v2 board, in various ways depending on the pads you’re using.
For the buffers, you might put a tiny dab of heat sink compound or solder paste on the big pad underneath the buffer, for better heat transfer to the board. This will help it to survive high currents better. You have to be careful not to use too much paste, or you can short one or more buffer pins; at best, the chip will simply not function right until the short is cleared, and at worst, this will kill the chip. Only go with solder paste if you know how to do reflow soldering. The heat sink compound option is easier for the uninitiated, and gives much of the benefit.
The easiest option with the op-amps is to use DIP-8 chips, with sockets. This removes any risk of damaging the op-amps due to the heat of soldering, and also lets you roll the op-amps to experiment with their sonic differences. There are adapters available to take two single-channel op-amps and convert them to the dual channel style needed for OPALR, and for taking SO-8 op-amps and letting you use them in DIP-8 sockets. You can get such adapters from Brown Dog, Ares and others.
The downside of big DIP chips, sockets, and adapters is that the extra material in all of these creates “parasitic” circuit elements. That is, there are additional resistances, capacitances, and inductances in the circuit, which can cause it to perform measurably — sometimes even audibly — worse. If you’re certain you know which chips you want to use, it’s better to solder them to the board, and to use SO-8 in preference to DIP-8. You lose flexibility and make repair harder, but it can be the difference between an amp that works and sounds good and one that doesn’t.
That having been said, most of the op-amps you hear people talking about in the context of PIMETAs work just fine in DIP form, in a socket.
13. Test the amp
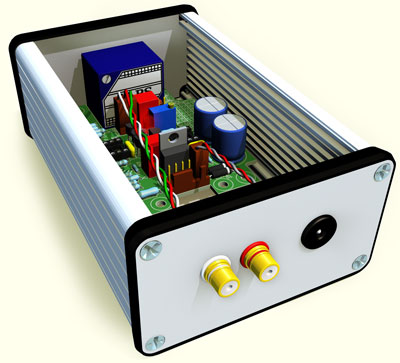
Turn the amp’s power on and do a quick re-check of the voltages at the chip supply pins. The LED should be lit, and the supplies at the op-amp pins split evenly relative to IG. You should also measure DC voltage between IG and OG now; it should be near-zero. (You couldn’t do this before, because the op-amps and buffers weren’t installed.)
Now touch the chips to see if any are getting warm. They should only be just a little warm, if you can feel anything at all. If they’re hot or burning, turn the amp off immediately; you have a fault of some kind.
Turn your meter to the DC millivolts scale and measure from IG to each output pin: you should be getting an absolute voltage of less than 20 mV. If you’re getting high DC offset levels, you have some debugging to do before you plug headphones into the amp. You might make an input shorting plug of some sort. I like to take a spare 3-pin female Molex connector and use it in place of the input jack assembly. This ensures that you’re not measuring induced noise. (This isn’t usually needed, as the PIMETA isn’t all that susceptible to RFI.)
Now that we’re reasonably sure the amp is safe to plug headphones into, ensure that the volume knob is turned all the way down, plug the source into the amp, plug some cheap headphones into the amp, and start something playing. Leave the headphones on the table, and slowly turn up the volume. One of several things will happen:
The volume changes level gradually as you turn the knob. Put the headphones on and listen critically. Ramp the volume up and down gently. If it sounds good, turn the volume all the way back down and repeat the test with your good headphones. If you hear any kind of noise, read Basic Troubleshooting for Headphone Amplifiers
The volume shoots up quickly and sounds crackly. You’ve got some kind of oscillation going on. (Aren’t you glad the headphones aren’t on your ears now?) Turn the volume down and find out what the problem is before continuing. The troubleshooting article linked above may help.
You don’t hear anything at all. The two most likely causes of this happening in the PIMETA v1 can’t happen with PIMETA v2. So, either you’ve made some real dummy mistake — source not plugged in, volume down, etc. — or something very weird is happening.
14. Adjust the class A bias
If you installed the parts for the class A biasing feature (the adjustment pot and limit resistor, LED1, RLED, and the transistors) you can now adjust the bias level. There are two different methods given in the documentation section at the first link above.
15. Do the casework and wiring
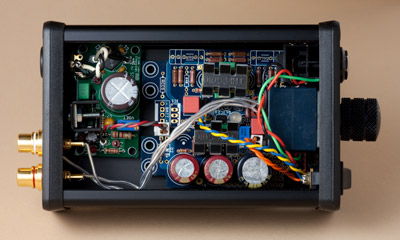
Now that you have a working amp, set it aside and do the casework.
If you haven’t done audio casework before and haven’t yet read my How to Wire Panel Components article, go read that now.
You may also want to refer to the picture at right, where I’ve deliberately used different wire colors for all connections to make tracing their paths easier. Starting in the upper left and going counterclockwise:
Black/white pair: unregulated DC from the barrel jack to a DC regulator board’s IN+ and IN- pads; there are various options for regulators here, or you can just use a regulated external power supply in the first place.
Red/gray pair: regulated DC from the regulator board’s output to the PIMETA v2’s WALL pads
Silver wire, clear insulation: input lines from RCA jacks to the amp board’s INPUTS pad set; it would be a good idea to use different colors here, I just wanted to use up some pure silver wire I had around
Blue/yellow pair: LED2 pads to the illuminated power switch on the front of the case
Orange pair: SW pads to the other two pads on the power switch; I didn’t use different colors as I did with the LED because it doesn’t matter which way you hook these up, as it does with the LED
Red/green/black set: output wires from a 3-pin Molex KK connector in the scratchpad area to the ¼" output jack; the wires from the OL, OG and OR pads to this Molex connector are on the bottom side of the board
If you’re using a metal case, see the grounding discussion at the end of the Power Supply Matters page. In the amp just described, I used isolated DC and headphone jacks so the case could be tied to IG via the RCA jacks and the pot ground strap.
That’s one specific case. More general advice:
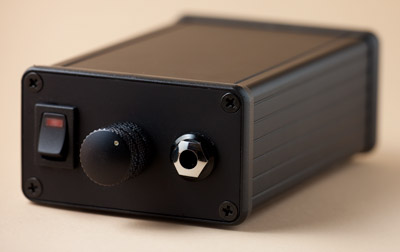
Power input: The BATT and WALL connectors are covered above. If you’re going to solder the wires directly to the board and not use connectors, refer to it anyway for the pin order.
Power switch: If you’re using the ALPS RK097 pot with the built-in power switch, you’re already set. Otherwise, you can either wire your switch to the S1 pads now, or connect the switch assembly to the board with the Molex connector.
LED: The LED setup details are covered above. Now’s the time to set up the panel wiring if you’re going to use one of the LEDs as a panel-mount power indicator.
INPUTS: Signal input. The three pads are marked IL, IR and IG, for the left, right and ground inputs. You can either build a cable assembly for your input jack and use a 3-pin Molex KK connector here, or you can solder the wires from the input jacks straight to the board.
OL, OR, OG: Signal output. Unlike the input pads, these couldn’t be clustered for layout reasons. You can use the scratchpad area to add an output connector if you like, however.
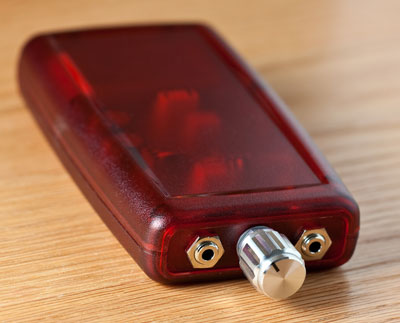
If you have multiple sets of inputs or outputs, wire only one set for the moment. You can install the additional switches and connectors in the panels, but it’s good to re-test a simple, solid configuration of the amp once it’s cased up before you add anything else.
Once you have the initial casework done and the amp installed, do a full system test. Casing it up shouldn’t change any behavior you found above, but it can! The most common errors introduced at this stage are grounding related, covered elsewhere.
16. Add extra features
Once everything’s working correctly, you can start adding uncommon features. Many of the options here are discussed in the next section, but there’s no limit. Just be sure to Re-test after you add each new feature. There’s nothing worse than finding the amp doesn’t work after adding three new features, and then having to figure out which of the three is causing the problem.
When all tests are passing, close the amp up. You’re done! Time to sit back and bask in the glow of a job well done. Grab a beverage and listen to some music.