Making a Headphone Dummy Load

So you’ve got a headphone amp, and you want to run some tests on it. It’s often best to have the amp running under load while you do the tests, but you might not want to use real headphones. Perhaps you need to test at higher voltages than your headphones will tolerate. Perhaps the device being tested doesn’t work entirely reliably yet, and so sometimes oscillates or puts big DC offsets out, neither of which is healthy for real headphones. Perhaps you want to be able to collaborate on tests with others who don’t have the same headphones as you. Or perhaps you just don’t want to listen to test tones.
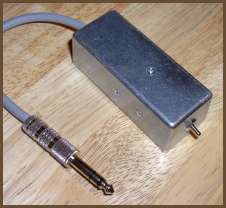
This article shows you how to build a “dummy load” that can be plugged into a headphone amp like a pair of headphones. It can be run to much higher currents and voltages than real headphones, it’s very durable, it’s easy to replicate, and it ought to be silent. :)
If you build it as shown in the pictures, it’ll run you about $35. You can cut it down to about $20 if you don’t want to be able to switch between two different load values. There are some ideas for improvement throughout the article; even if you try all of them, you should still be able to keep the total parts cost under $100.
Parts
The enclosure is Bud part CU-123 (Digi-Key 377-1107-ND, Mouser 563-CU-123). A nearly identical enclosure is Hammond part 1590A (Digi-Key HM150-ND, Mouser 546-1590A-GY). The Bud box is cheaper and it’s got a nicer finish. (They’re both ugly, but the Bud box is slightly less so.) The Hammond box’s extra cost is worth it if you don’t have a tap set: its screw holes are tapped out already so you don’t have to make threads by forcing the screws in the first time. A bit of time with some fine sandpaper would fix the Hammond’s finish problem. Another advantage to the Hammond is that it’s also available in a black-anodized version.
If you don’t want a switchable dummy load, both Hammond and Bud have much smaller boxes in the same line as the ones I’ve recommended above. They’ve each got one that’s roughly a 1.25 inch cube which would work wonderfully.
The resistors are Ohmite TCH35P series, though lower-wattage ones like the TBH25 series would also work. Both of these resistor lines are pretty expensive, but I like them because the TO-220 package easily bolts to the side of the case. You could use cheap cement wirewound types instead and just epoxy them into place. The values are 33 Ω and 330 Ω, to be similar to typical headphones. The box has room for a third pair of resistors; 120 Ω?
That brings us to the switch. The one in the picture is a standard DPDT toggle switch, by E-Switch. I didn’t keep a record of which one I used, but it’s probably a 100DP1T1B1M1QEH (Digi-Key EG2398-ND, Mouser 612-100-F1111). Many other companies make similar units: Carling, C&K, NKK, Tyco/Alcoswitch.... If you did want a third resistance option, however, you’d need to change to a DP3T switch. The DP3T equivalent to the DPDT shown is the E-Switch 100DP3T1B1M1QEH (Digi-Key EG2413-ND, Mouser 612-100-H1111) which is not too much more than the DPDT. You could also go with a rotary switch, but to get one that’s compact enough to fit the recommended enclosure, the cost will be pretty high.
The headphone cable is good old Canare Star Quad (L-4E6S) with a connector I found locally. The strain relief is a bog standard sort for 0.25" cable. You could use lots of other things here.
Beyond that, you need some #4-40 bolts and nuts, hookup wire, and basic casework tools.
Assembly
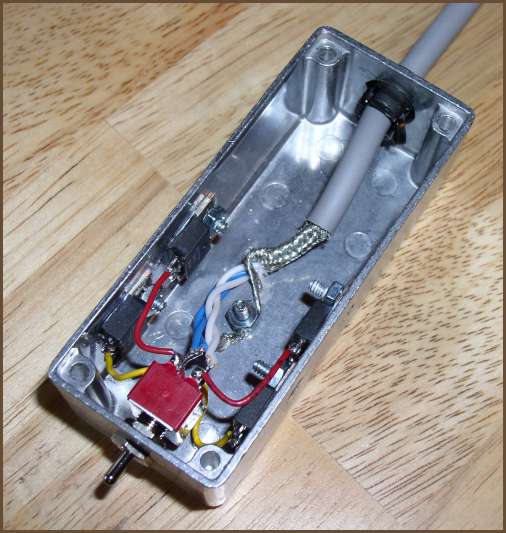
Since all of the resistors have one leg going to ground, and the headphone cable also has a ground, I decided to make the enclosure ground. I just had to run a wire from one leg of each resistor to the mounting tab of the resistor and trap the stripped end under the mounting nut. It would have saved me some time if I had done this bit of wiring before mounting the resistors. (Hint.) You also have to add a bolt for connecting the headphone cable’s ground shield to the case.
The common lugs of the switch go to the headphone cable’s signal wires. The remaining switch lugs connect to the ungrounded end of each resistor. Pretty simple.

|